Creating and Editing SLAs
SLAs must be entered in the SLA Manager, which is located in the Other menu of the Incident, Service Request, and Change modules. You can apply SLAs to incident, service request, or change tickets.
Note: If you do not have access to the SLA Manager, check with your ChangeGear administrator to ensure that SLAs have been enabled.
ChangeGear includes a default SLA that matches any ticket entered into the system once the SLA is active. If a ticket matches multiple SLAs, the most restrictive SLA is applied. For example, if one SLA requires a resolution time of two days and another SLA requires a resolution time of 24 hours, the 24 hour SLA is applied, assuming that the ticket matches the conditions for both SLAs.
To create or edit an SLA:
-
Open the SLA Manager.
-
Click New in the toolbar or open an SLA from the list. The SLA Editor displays.
-
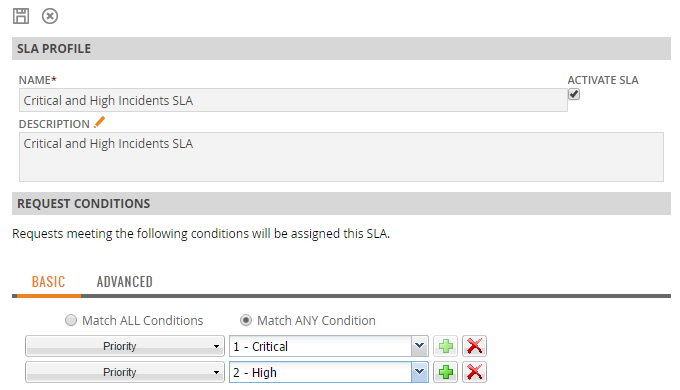
Type in a Name for the SLA.
-
Select the Activate SLA check box if you want the SLA to be active immediately. An SLA must be activated in order to be evaluated against tickets.
-
Enter a Description.
-
Select the conditions that a ticket must meet before the SLA is applied. You can define the conditions using the Basic Editor or the Advanced Editor. For more information, see the Basic Editor and Advanced Editor sections.
-
Set a resolution time for the SLA. You can set the resolution time in days, hours, and minutes.
-
Select whether the SLA should Respect Business Hours. If this box is checked, the resolution time factors in the global business hours defined in the Desktop Client. Selecting this option also recalculates the SLA Resolution Time using business hours.
-
For example, if your business hours are 9:00 AM – 5:00 PM (8 hours) Monday through Friday and you enter 2 days (48 hours) as the resolution time, a ticket created Monday at 9:00 AM would normally be due on Wednesday at 9:00 AM. With Respect Business Hours enabled, a ticket created Monday at 9:00 AM is due the following Monday by 5:00 PM.
-
Select Apply Selected Operating Calendar to ticket to apply a specific operating calendar and recalculate the estimated resolution time. The business hours defined in the operating calendar override the global business hours. For more information, see Configuring Operating Calendars.

-
-
Select Override Due Date if the due date calculated by the SLA should override the due date specified by the user.
-
Define Escalation Rules for the SLA.
-
Select the Warning check box to enable the warning stage. The warning stage notifies the ticket assignee after the specified time frame has passed.
-
Select the Escalation check boxes to enable the various escalation stages. In addition to notifying the assignee, the escalation stages will notify other users, teams, or roles. You can also reassign the ticket to the person (or persons) selected by checking the Reassign When Escalating check box.
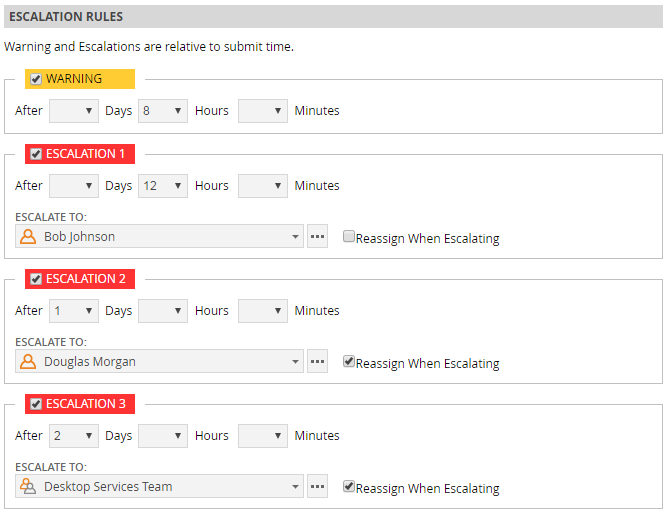
Note: You must enable the escalation rules in order. For instance, you cannot enable Escalation 2 if Escalation 1 is disabled.
-
-
Click
 to save the SLA.