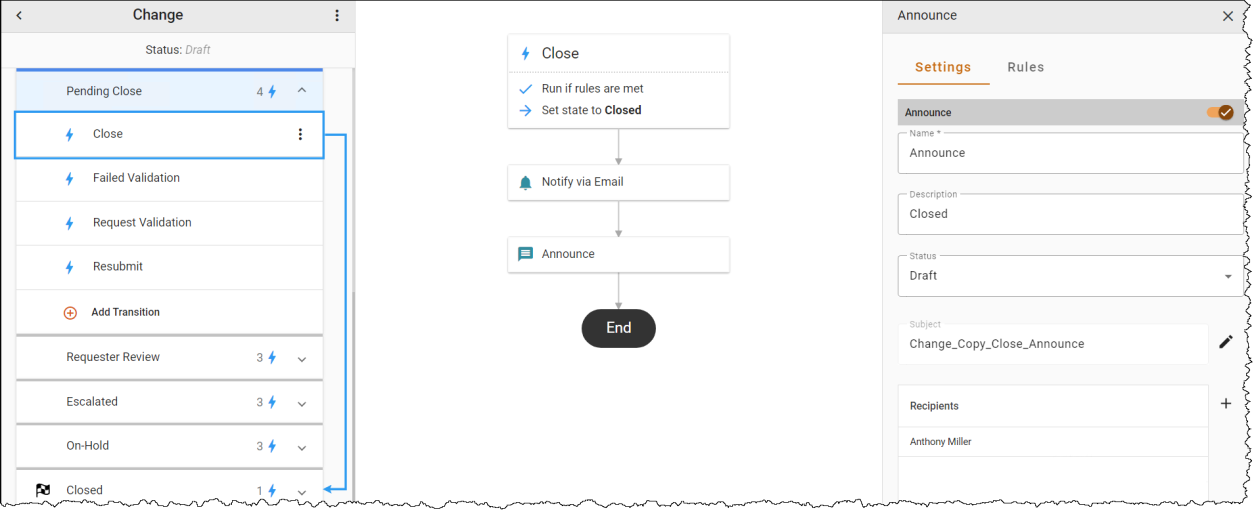
Announce
You can use the Announce automation to post updates to the Web Announcement Portal.
To add an Announce automation to a workflow:
-
Hover over a transition line below the Action to view and click the
 icon. Select the Announce automation in the Select automation drop-down. The Automation Properties Panel displays.
 -
In the Name field, enter the name of the automation.
-
Optionally, enter a Description of the automation.
-
In the Status drop-down menu, select the state that you want the created Announcement to be.
Tip: Select Published if you want the Announcement directly published to the Announcement Portal.
-
Click Edit
 to create the announcement.
Note: To create an announcement with the same subject and body as the RFC, use the variables $(Parent.Summary) in the Subject field and $(Parent.Description) in the Body field.
-
To add recipients, click the
 button and double-click a recipient, or select a recipient and click Add. You can select recipients from the Users, Teams, Roles, Dynamic Roles, or Contacts tabs. If you do not want to e-mail the announcement, leave this field blank.
Note: Make sure the action is enabled.
-
Optionally, select the Rules tab to use the Criteria Builder to add conditions to the automation.
-
Click the 3-dot menu
 next to the workflow name, then Save or Publish the workflow to see your changes.