Modifying the Actions Toolbar
Actions are displayed on a per-state basis in ChangeGear. The visible actions are also controlled by user privileges as every action in ChangeGear has a corresponding privilege that must be set for users, or specific user roles, to view and trigger the action.
Note: If you create an action, you must ensure the privilege for that action is set appropriately for your user roles. See Defining Role Privileges for more information.
Modifying actions visible per state in ChangeGear involves modifying the state properties in the Workflow Designer. In the Properties Panel, the Action Buttons control which actions are visible in a state.
Using a previous scenario of creating a new state, "Deployed," we will now add the "Deploy" transition to the In-Progress state. In this example, as soon as a transition is added, the corresponding transition is automatically added to the list of action buttons you can edit or update as needed.
To modify the actions toolbar:
- Select an existing workflow to modify. You can either create a copy of the workflow or open the workflow in Design Mode, then save it as a new workflow. If saving as a new workflow, name the workflow and click OK.
-
In the Left Panel under States, select the In-Progress state.
-
To add the connection to the Deployed state, select the In-Progress State, then click the
 Add Transition option. The Add Transition dialog displays.
 -
Select Deployed from the To drop-down.
-
Enter Deploy in the Name field.
-
Click OK. This creates a transition between two states that is triggered by selecting the action button in the forms.
-
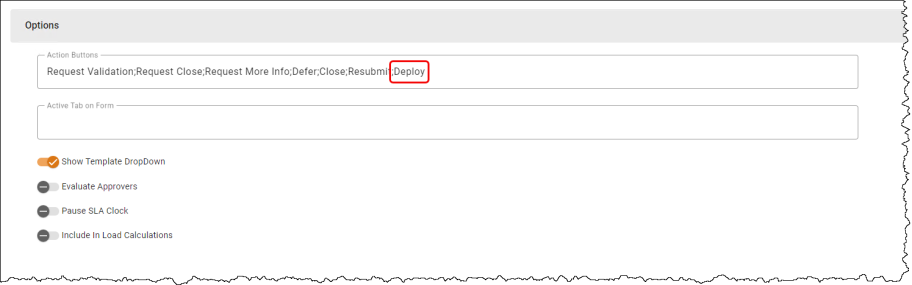
Within the Options Panel, Deploy; is now displayed in the Action Buttons field.
-
Click the three-dot menu next to the workflow name
 , then Save or Publish the workflow.