Adding Users with Web Administration
You can add a user to ChangeGear from the Users page and define user details such as the appropriate license for the user, the logon security access, the type of authentication to be used, and user profile information. To save time and increase security, some details are automatically populated fromWindows AD.
A key feature of ChangeGear is the integration of user authentication using Microsoft Windows Active Directory (AD), or your network domain controller. Using AD, users don't have to re-enter their credentials when accessing ChangeGear. This feature saves time, credentials are easier to manage because there are no separate user passwords to maintain, and if a user's Windows network account is disabled their ChangeGear account becomes disabled also.
When creating users in ChangeGear, some key details are automatically populated from the AD. For example, Windows may provide the user’s first name, last name, and e-mail address. Note: You can also select to allow users to automatically register (auto-registration), but you must set this up using the desktop administration module.
To add a User:
-
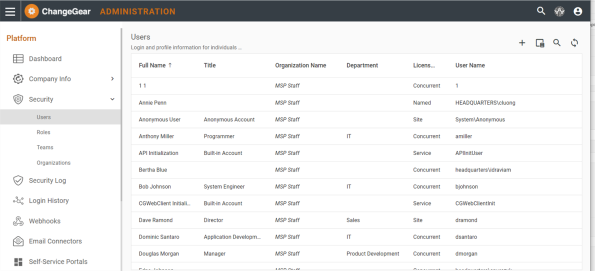
From the Web Administration page, click Security> Users. ChangeGear displays the Users page.
-
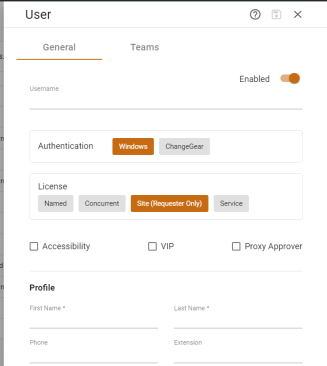
To add a new user, click the plus sign in the upper right corner. ChangeGear opens the slide-out User editor.
-
Enter the Username. If you are manually entering user names (for example, creating ChangeGear authorized users), you can use the person's e-mail address as their user name. ChangeGear allows alpha-numeric characters and the following special characters to be used for user names:
. @ ! # $ % & ' * + - / = ? ^ _ ` { | } ~
Additionally, user names may not be more than 256 characters long and IDs may not be more than 100 characters long. -
In the Authentication section, choose how you want the user to be authenticated. You can choose Windows Authentication or ChangeGear Authentication. If you choose ChangeGear, manually enter the User Name (in the form of domainname\username or username@domainname.com) andPassword.
-
Select the type of License assigned to this user. Selecting the license type also changes the role field. The Site license type gives the user requester type roles, and a default role of Change Requesters. Named or Concurrent license types gives the user non-requester type roles, and the IT Staff default role. The Service license type gives the user service type roles, and the All Priviledges role as a default.
-
Check Accessibility if you want to assign the accessibility mode to this user. In compliance with Section 508, ChangeGear provides an accessibility mode for those users who interact with computers via assistive technology. The accessibility mode enhances the usability of ChangeGear for screen readers, enabling users to interact with ChangeGear entirely from the keyboard. Users will be able to open tickets from the grid, navigate between tabs, and sort column headers.
-
Check VIP to assign this user VIP (Very Important Person) status. A VIP user is a user that you wish to distinguish from other users as well as possibly provide additional privileges or services. For ChangeGear staff users (not end users), ChangeGear highlights VIP users with a VIP icon next to their names as well as highlighting any tickets they request with a VIP icon. Depending on your business requirements you can also customize ChangeGear to use the User VIP state and/or the ticket VIP state to provide additional VIP specific functionality.
-
Check Proxy Approver to assign this user as a proxy approver. This selection allows a user to approve on behalf of another user. With a proxy approver selected, either user can approve tickets until the proxy is disabled. For example, if Rose Stephens is going on vacation, the ChangeGear administrator can set Tom Bryant as Rose's proxy approver so long as Tom has approval privileges in ChangeGear. When Tom is Rose's proxy approver, Tom is treated as an approver on Rose's tickets, including receiving notifications and viewing Rose's pending approval tickets in Tom's Pending Approval view. After Rose gets back from vacation, the ChangeGear Administrator can disable the proxy approver flag and Tom will no longer receive notifications or view approval tickets assigned to Rose.
Note: The list of approvers on the ticket does not reflect who the proxy is, or after the fact, who acted as the proxy. Any approval actions made by Tom are listed in the history as "Approved by Proxy for: rstephens." As expected, if Tom and Rose are part of the same approval sequence that requires all users to approve, Tom must register his approval twice once as himself and a second time as proxy for Rose.
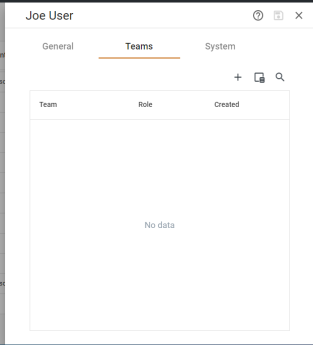
- The Teams tab shows what teams this user is assigned to, and the System tab shows system-level information about this team. Note: On this tab, you can only add notification teams.
Note: You do not have to complete every field in the Users Editor tab, but you must complete the Role field under the Profile section. ChangeGear’s assignments and privileges depend on the roles of your users.
Enter the User's Profile Information
Next, scroll down and enter profile information for the user. Two fields are required in this section, First Name and Last Name.
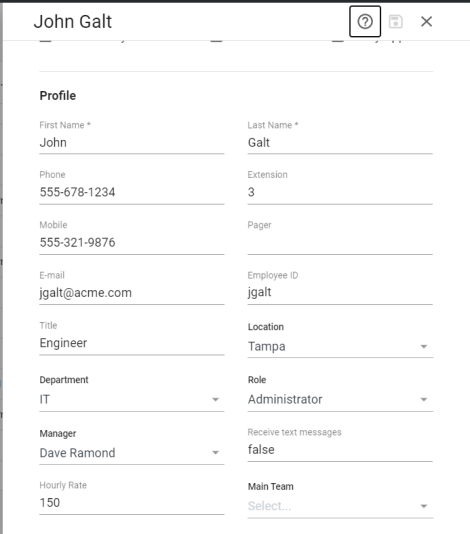
In the User Profile section, complete the user detailed information fields such as Location, Department, Role, Manager, and whether or not this user will Receive text messages. Note: For a list of predefined roles and their meanings, see Predefined Roles in Web Admin.
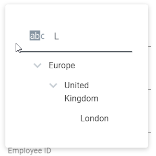
Note: The Department and Location fields are hierarchical, and enable you to drill down to select the option you need. For example, if you select Location you can then select Europe, then United Kingdom, and then London.
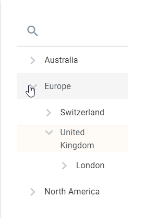
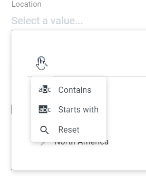
Or, you can search within the field to help find what you need. Hover over the search icon to see the search options Contains, and Starts With. For example, in the search field you can enter L to see all options starting with the letter L (such as London). (The Reset option removes whatever value you entered in the search field.)
ChangeGear uses the Hourly Rate to calculate the total cost of a change request. When a change request task is created, ChangeGear multiplies the number of hours needed to complete the task (as indicated by the Effort field) by the rate defined in the user's profile. Main Team is the name of the team associated with the user's primary function. ChangeGear automatically sets Main Team when a team is added to the user, if the user did not have a team before. Also if a team is deleted from the user, ChangeGear sets Main Teamto the the next team in alphabetical order. If there are not more teams then the Main Team is blank.
Note:In addition to the setting in the user's profile, users can set their default Change Mode themselves through the User Profile window in the ChangeGear Web client.
Finally, click the save button  to save this user's settings.
Adding a User to a Team
After adding a new user and saving that user, you can then assign the user to a team.'
- Create a new user and save the settings.
- On the main screen, highlight the new user and click on the
 to edit that user. ChangeGear opens the user slide-out editor.
 - Click on the Teams tab.
- Click
 to add a team.
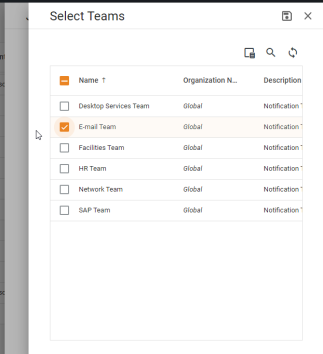
- Check the team you want to assign to this user, then click Save.
Viewing System User Information
When you create a new user and save it, ChangeGear automatically assigns system information that you can view.
- Create a new user and save the settings.
- On the main screen, highlight the new user and click on the to edit that user. ChangeGear opens the user slide-out editor.
- Click on the System tab.
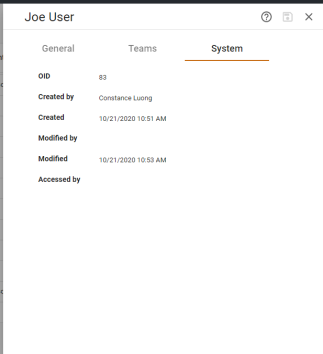
- On this tab you can view the OID, Created by name, Created date, Modified by last, Modified last date, and Accessed by.