Customizing the Service Catalog
Enabling the Shopping Cart and Pricing Options
The shopping cart can be enabled in ChangeGear Web in the Service Catalog. Displaying pricing on catalog items is optional and is enabled in the same location. Pricing does not have to be enabled for the admin to set and edit item prices. This allows the admin to fully setup all item prices before turning on pricing.
To enable the Shopping Cart and Pricing Options:
-
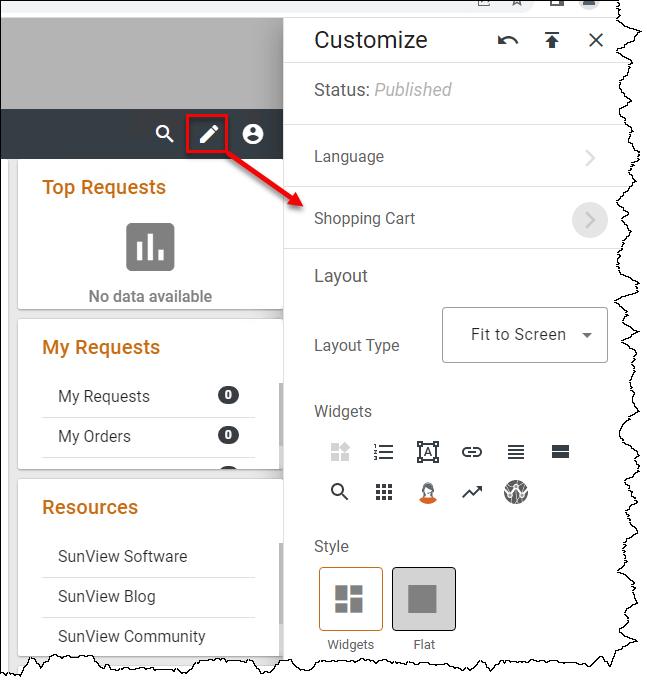
In the Service Catalog, click the pencil icon to open the page in edit mode, then click the arrow next to Shopping Cart.
-
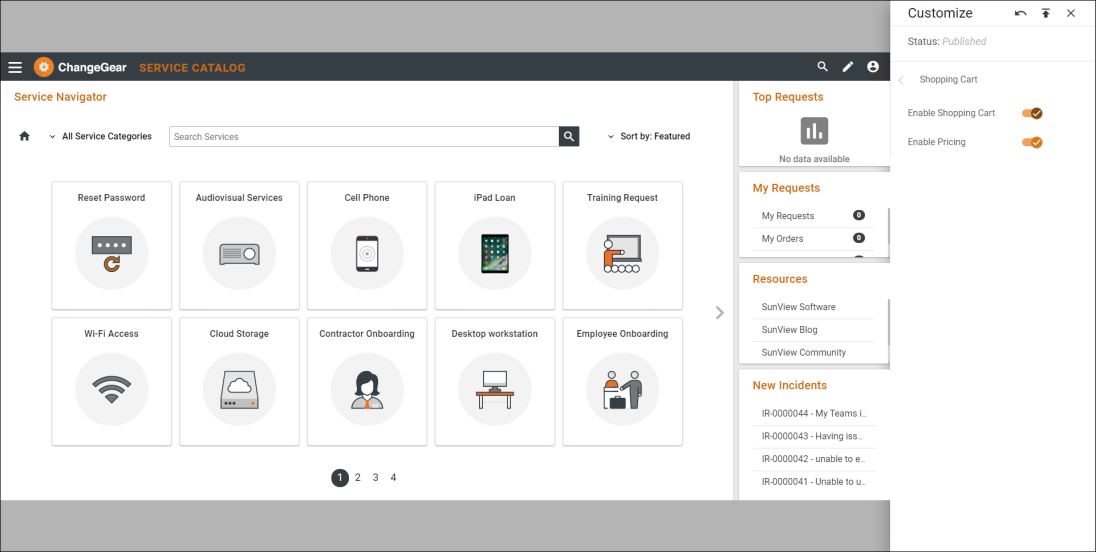
In Shopping Cart settings, click the toggle(s) next to Enable Shopping Cart and/or Enable Pricing. Click
 to publish your changes.
Note: If pricing is disabled, shopping cart items can be added to the cart but no pricing information is displayed.
Customizing the Service Catalog Content and Layout
The Service Catalog can easily be edited and customized using a drag-and-drop web interface.
Users with permission to edit the Service Catalog will see a pencil icon in the upper-right corner of the screen when viewing the Service Catalog on the web.
To edit the Service Catalog:
-
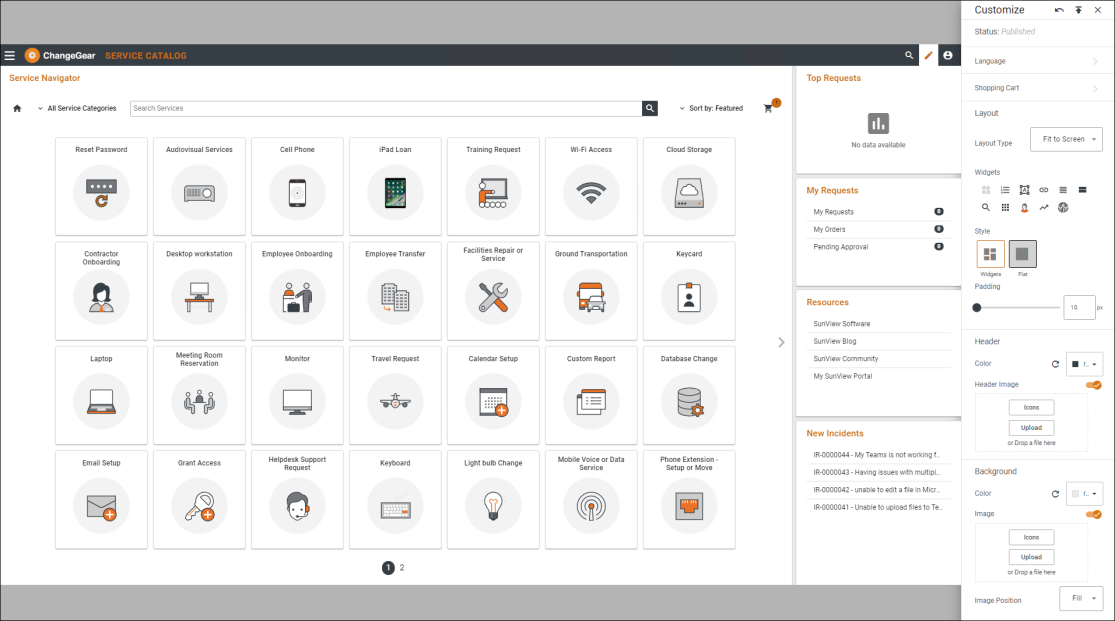
Click the pencil icon to open the page in edit mode. The widget pallet appears on the right side of the screen, as shown below.
-
While in edit mode, the widgets on the page can be dragged around and re-sized on the canvas. When moving or re-sizing a widget, the canvas will display with grid lines to help with lining up widgets. Widgets of similar size will swap places when you move one widget on top of the other.
To add a new widget:
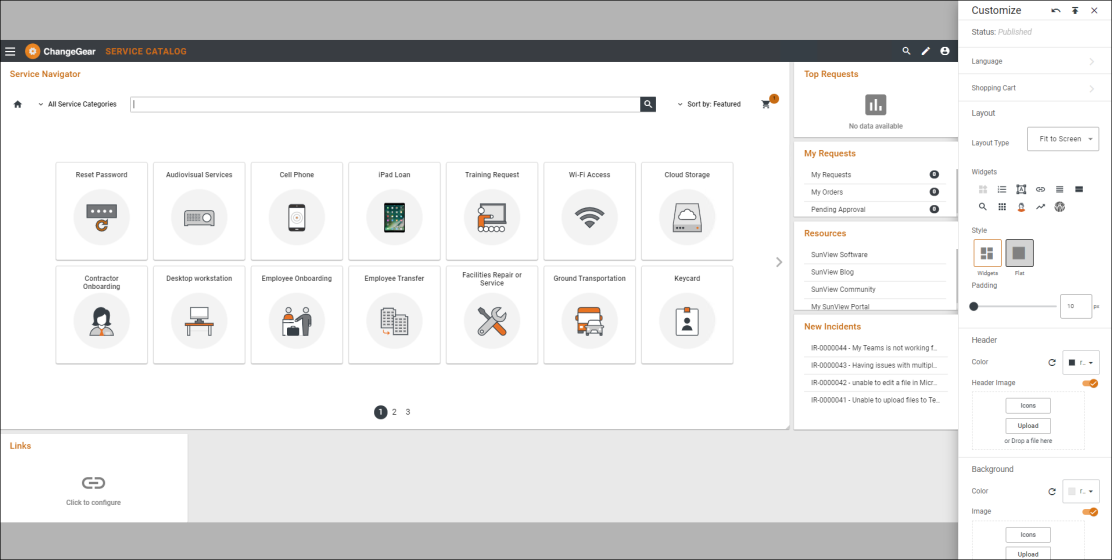
Click any widget icon on the pallet to add a new widget to the canvas. The widget will appear in the first available open space on the canvas. In the example below, the user has added a new Links widget to the canvas.
To configure a widget:
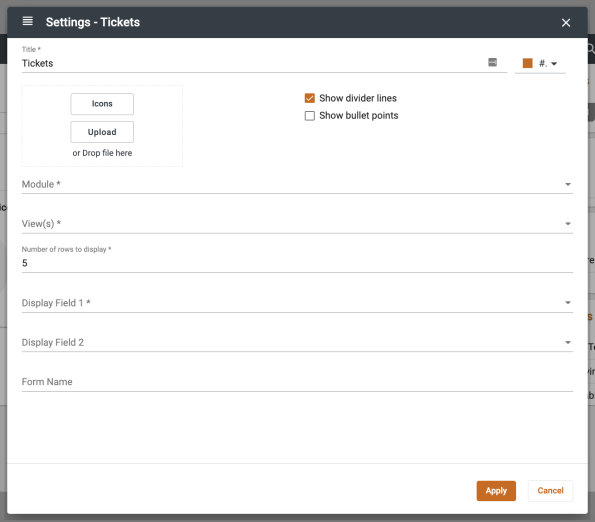
Click the gear icon that appears in the upper-right corner of the widget, or select Click to configure in the center of the widget. In the example below, the user is configuring a Tickets widget. The two fields named "Display Field" must be typed manually and must match existing ticket text field names.
To reset or publish changes:
Use the Actions menu to reset or publish changes.

To exit edit mode, click the X icon.