Creating a New State
Creating new states implies that you need to plan new actions and transitions to go to and from the new state. Therefore, before you add a new state, you should:
-
identify what transitions will be allowed from this state
-
what timeline events should be shown in the workflow status bar
-
which states connect to or from the new state
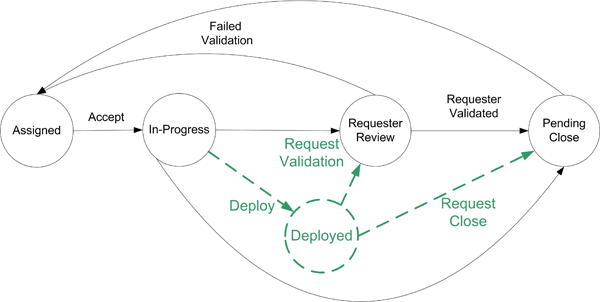
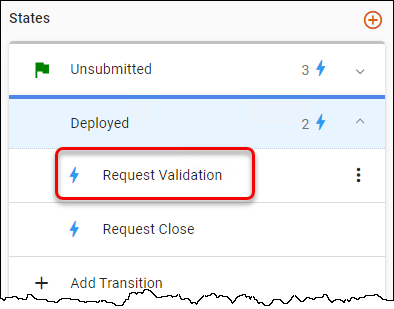
In this scenario, we are creating a new state called "Deployed."
-
Deployed state will have 2 transitions, Request Validation and Request Close, as seen in the picture above.
-
The timeline will be similar to In-Progress, but Deployed will be added between In-Progress and Requester Review.
-
The Deployed state can only be reached from a ticket that is In-Progress. The only states that can be reached from Deployed are Requester Review and Pending Close.
The following screenshot depicts the workflow status bar before a new state is added and changes are made to the workflow status bar.

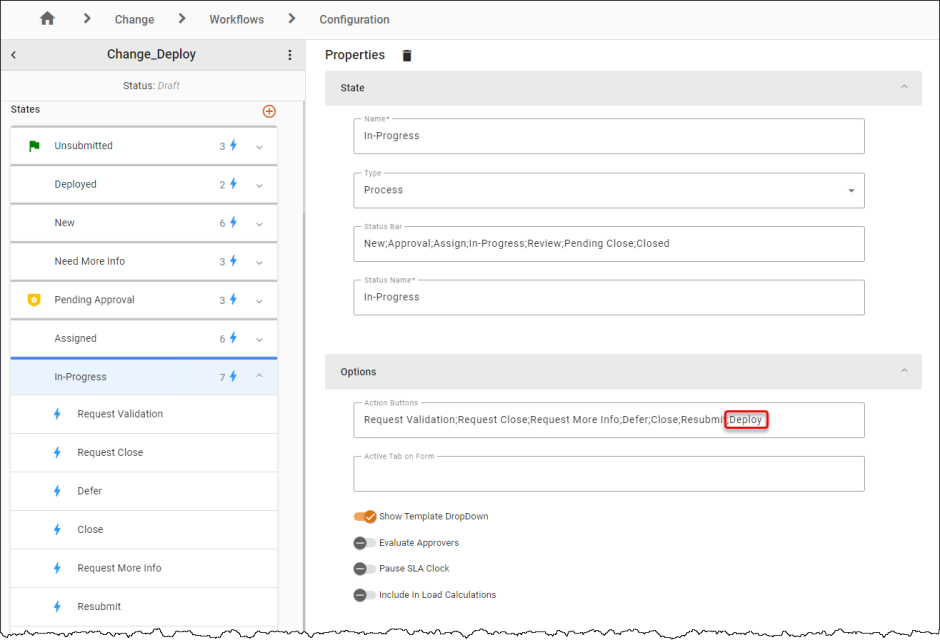
The next screenshot shows the actions available to tickets in the In-Progress state.
![]()
To create a new state:
When a State is selected, it will auto-expand to reveal the transitions associated with that state. Additionally, an Add Transition option is located below the list of transitions, allowing you to create a new transition, or select an existing transition.
-
In Design Studio, click All Apps, or navigate to the desired app (i.e. Change), then select Workflows component. A grid displays all workflows.
-
Select an existing workflow to modify. You can either create a copy of the workflow or double-click the row to open the workflow in Design Mode, then save it as a new workflow. If saving as a new workflow, name the workflow and click OK.
-
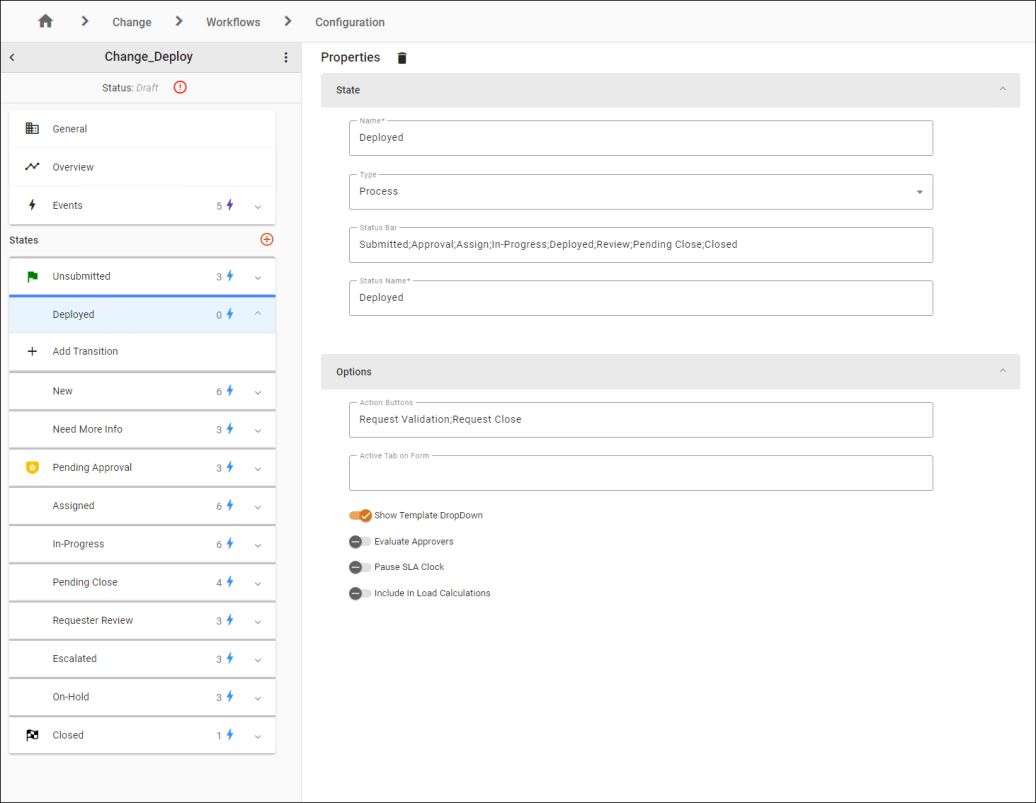
To the right of States, click the + to Add State. The Main Content Area displays the new state properties, including a generated name, and the Type of state set to "Process" by default.
-
Within the State Panel:
-
Enter "Deployed" as the value of Name.
Note: The name of the new state must be unique.
-
Select the type of state from the Type drop-down. This example uses the "Process" state.
-
Edit the Status Bar to read: Submitted;Approval;Assign;In-Progress;Deployed;Review;Pending Close;Closed.
-
-
Within the Options Panel:
-
Type in the values Request Validation;Request Close in the Action Buttons field.
-
Optionally, list the Active Tab on Form (History, Attachment, etc.) when in this state.
-
Enable the toggle(s) for any additional options, including:
-
Show Template Dropdown - enables a dropdown menu for selecting templates in this state.
-
Evaluate Approvers - ensures the workflow identifies and validates the required approvers.
-
Pause SLA Clock - stops the SLA timer while the workflow remains in this state.
-
Include in Load Calculations - includes time spent in this state in workload and performance metrics.
-
-
-
If Luma Copilot is licensed and enabled, you can enable the Luma Copilot Summarization option. See Luma Summarization for more information.
-
To add the connection to the Deployed state, select the In-Progress State, then click the
 Add Transition option.
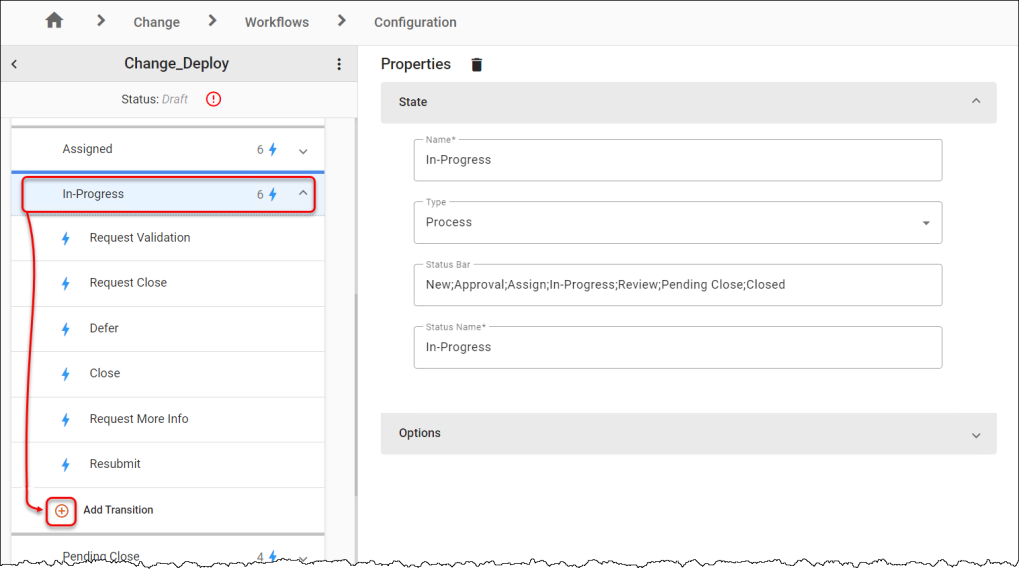
-
Select Deployed from the To drop-down.
-
Enter Deploy in the Name field.
Note: New actions are created from the State tab if you add a Name that does not exist in the drop-down menu.
-
Click OK.
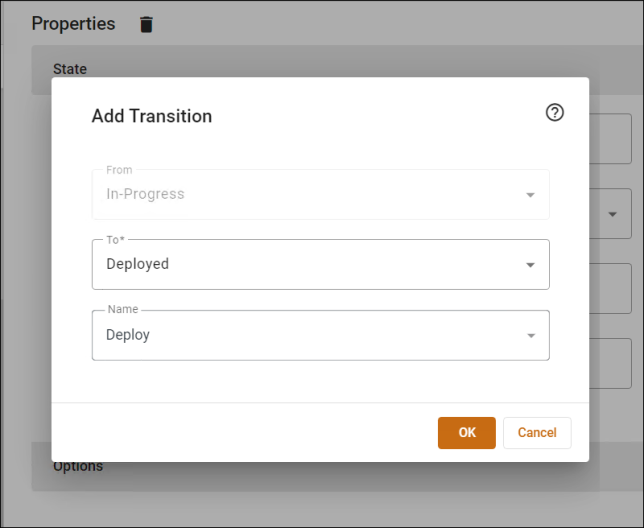
The new connection is displayed in the Left Panel.
-
-
To add a connection from the Deployed state, select the Deployed state, then click the
Add Transition option.-
Select Requester Review from the To drop-down.
-
Enter Request Validation in the Name* field.
-
Click OK. The new connection is displayed in the Left Panel.
-
-
Add another connection from the Deployed state named Pending Close. In the Deployed state, click the
Add Transition option.-
Select Pending Closefrom the To drop-down.
-
Name the transition Request Close.
-
Click OK.The new connection is displayed in the Left Panel.
-
-
In the Left Panel under States, select the In-Progress.
-
Under the Options panel, notice Deploy; is added to the Action Buttons.
-
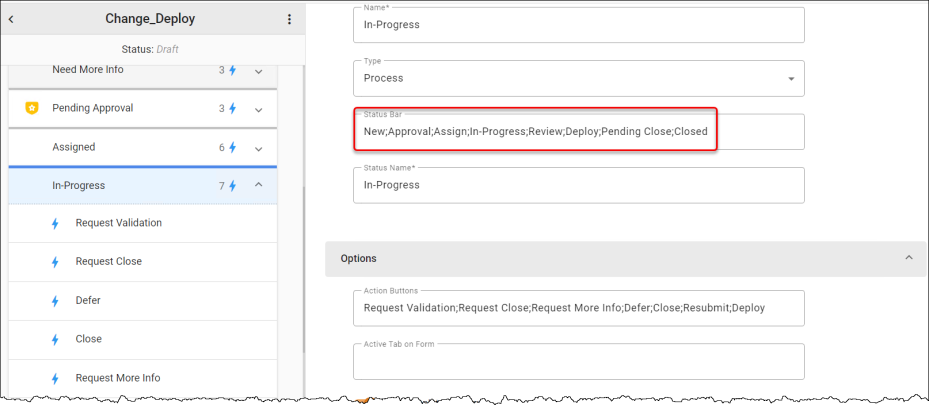
Modify the Status Bar information for each state as needed.
Note: If you want the Deployed state to be visible on the Workflow Status bar, you must edit each state’s timeline.
-
Next to the workflow name, click the three-dot menu, then Publish the workflow.
-
Set the workflow as the default to see your changes.
See also: