Removing Transitions
To remove a transition, you only need to know the transition's name you are deleting.

In this scenario, we are removing the transition "Defer," which, in the previous scenario, had the state that it usually lead to removed.
-
the state from which you will remove the transition and action
-
the target connection
-
the name of the action
For example, if you decide that newly submitted tickets cannot directly go from Submitted to Closed, you can remove the transition between those two states.
To remove transitions:
-
In Design Studio, click All Apps, or navigate to the desired app (i.e. Change), then select Workflows.
-
Select an existing workflow to modify. You can either create a copy of the workflow or open the workflow in Design Mode, then save it as a new workflow. If saving as a new workflow, name the workflow and click OK.
-
In the Left Panel under States, select a state, then click on the transition you wish to modify. This scenario uses Defer.
-
To delete a single transition, click the three-dot menu
 within the transition, then select the Delete option
OR
to delete the entire action and remove all transitions, click the Trash
 icon within the action. The system prompts you to ensure that the selected connection is the one you are trying to remove, and a confirmation dialog will display with the message "Deleting action 'Defer' will delete all the transitions referenced by this action. Do you want to continue?"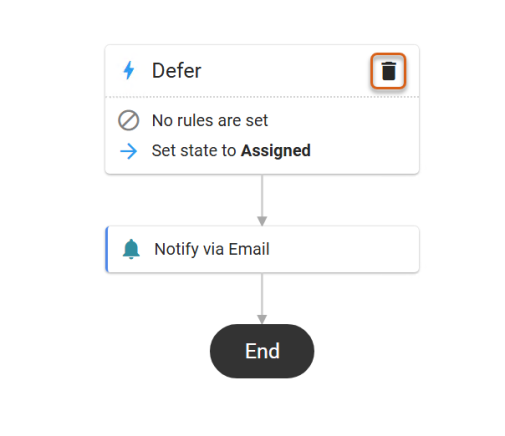
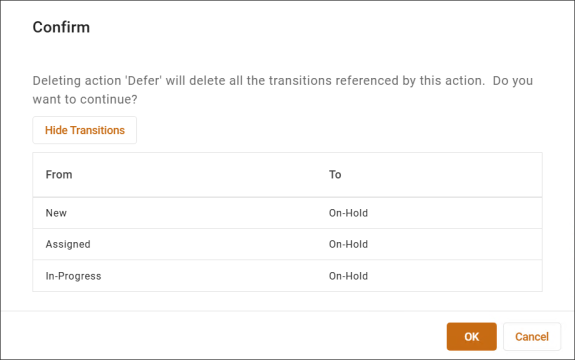
Click OK. This removes all transitions with the action and categorizes the action as an event.
-
Click the three-dot menu next to the workflow name, then Publish the workflow.
-
Set the workflow as the default to see your changes.
See Also:
Modifying Transitions in a State