Modifying Transitions
Adding or Editing a Transition
To add a transition to a state, you should know:
-
the state for which you will add the transition
-
the target state
-
the name of the transition
Note: To add a transition to a factory workflow , you must save the workflow as a new workflow. For example, adding a transition with name 'Submit Change' will also add a corresponding action with the same name. All automations are then added to the action. The order of operation when the action is triggered can be seen in the action flow.
Important: When adding or editing a transition from a state, there cannot be two transitions with the same name that have different target states.
To add a transition to a state:
-
In Design Studio, click All Apps, or navigate to the desired app (i.e. Change), then select Workflows.
-
Select an existing workflow to modify. You can either create a copy of the workflow or open the workflow in Design Mode, then save it as a new workflow. If saving as a new workflow, name the workflow and click OK.
-
In the Left Panel under States, select a state, then click the
 Add Transition option.
 -
Select the desired end (target) state in the To drop-down, then select an existing action or type in a new action you want to happen during this transition in the Name drop-down. Click OK.
A transition line is now drawn to display the new target state and the action card is updated with the new target state. See Creating a New Transition for more details.
![]()
To edit a transition in a state:
-
In Design Studio, click All Apps, or navigate to the desired app (i.e. Change), then select Workflows.
-
Select an existing workflow to modify. You can either create a copy of the workflow or open the workflow in Design Mode, then save it as a new workflow. If saving as a new workflow, name the workflow and click OK.
-
In the Left Panel under States, select a state, then click on the transition you wish to modify to view the three-dot menu.
-
Click the three-dot menu, then select the Edit option.
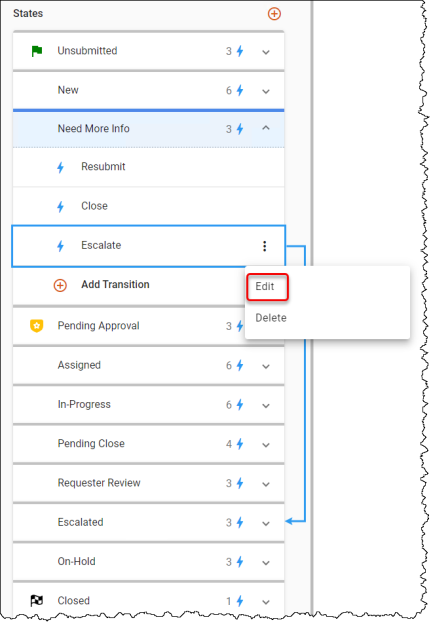
-
Select the desired end (target) state from the To drop-down, then click OK.
The transition line is now redrawn to display the new target state and the action card is updated with the new target state.
Removing a Transition
To remove a transition from a state, you should know:
-
the state from which you will remove the transition and action
-
the target connection
-
the name of the action
For example, if you decide that newly submitted tickets cannot directly go from Submitted to Closed, you can remove the transition between those two states.
To remove transitions from a state:
-
In Design Studio, click All Apps, or navigate to the desired app (i.e. Change), then select Workflows.
-
Select an existing workflow to modify. You can either create a copy of the workflow or open the workflow in Design Mode, then save it as a new workflow. If saving as a new workflow, name the workflow and click OK.
-
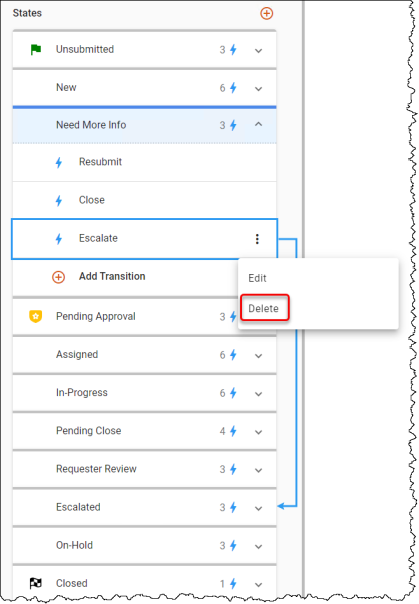
In the Left Panel under States, select a state, then click on the transition you wish to modify to view the three-dot menu.
-
Click the three-dot menu, then select the Delete option. The system prompts you to ensure that the selected connection is the one you are trying to remove. Click OK.
-
Click the three-dot menu next to the workflow name, then Publish the workflow.
-
Set the workflow as the default to see your changes. See an example in the topic, Removing a Transition.
See also: