Adding and Editing Blackout Periods
ChangeGear Web administration enables you to create Blackout Periods if you are licensed for this feature.
Note: Change Windows and Blackout Periods require Advanced Change Management in the license. This includes any Business Policy Automations (BPAs), and management features pertaining to the Change Window and Blackout Period features.
To create and edit Blackout Periods in Design Studio:
-
Navigate to ChangeGear Web > Administration > Design Studio > Change.
-
Select the Blackout Periods component. The Blackout Periods Screen displays all blackout periods associated with the app (If you do not have the needed license, you will not see this option.)
-
To add a Blackout Period, click the plus sign
 to open the slide-out editor.
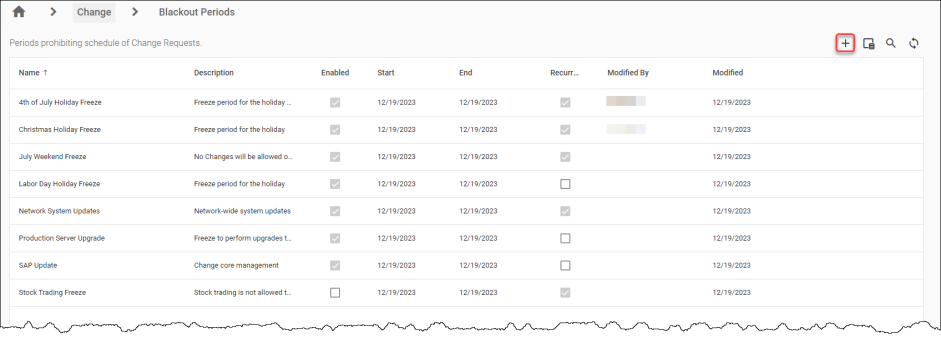
-OR-
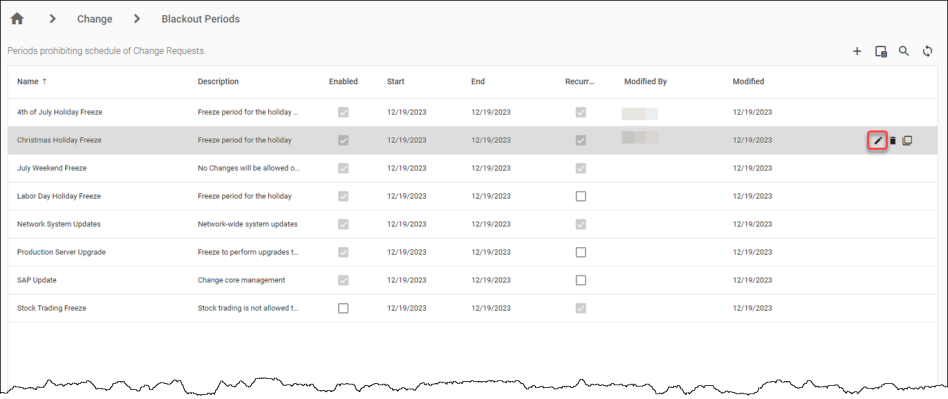
To edit a Blackout Period, hover over the existing Blackout Period in the grid to display the edit/pencil icon  and delete
  icons, then click
  to display the corresponding slide-out editor and make changes as described in the next steps.
-
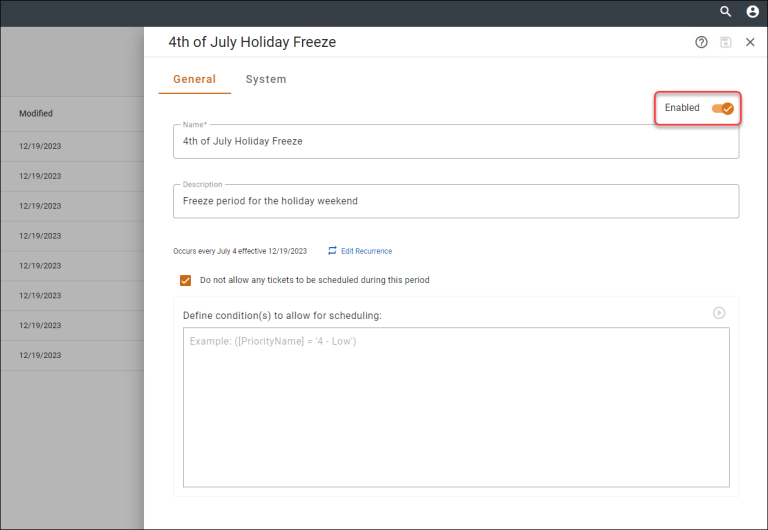
Click the toggle to enable/disable the Blackout Period you are creating/editing.
-
Enter the Name and Description of the Blackout Period.
-
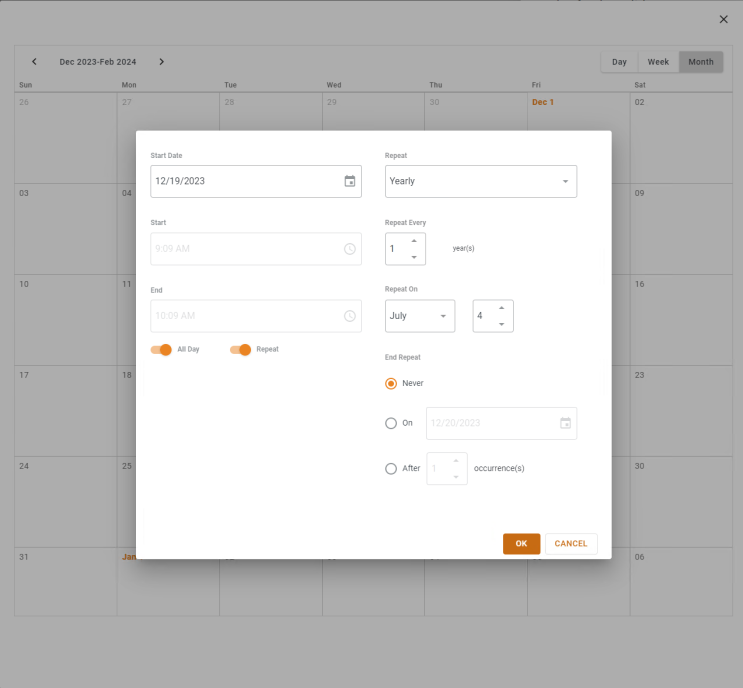
Click Edit Recurrence to set the Start and End dates. If you don't want to include a specific time range, you can set the start and end dates and times to All Day by enabling the toggle.
-
Make the window recurring, if appropriate (see Setting Up Recurring Change Windows and/or Blackout Periods).
-
Review any tickets that will be affected by this new/edited Change Window (see Analyze the Impact of Modified Dates on Change Windows and Blackout Periods).
-
Click OK to save the settings.
-
The checkbox for Do not allow any tickets to be scheduled during this period is enabled by default.
Note: If you disable the Do not allow tickets to be scheduled during this period option so that certain tickets can be scheduled during the set time period, you must define the conditions for that allowance. Furthermore, you must follow the condition format as follows: ([PriorityName] = X). For example, if you enter the condition as ([UrgencyName] = ‘1 – High’, only tickets with a designation of High priority will be allowed to be scheduled during the set time period. Only when the condition(s) is formatted properly, can you save it.
-
Click the save icon
 to save the Blackout Period.
-
Click X to close the slide-out editor and return to the grid.
See also:
Setting Up Recurring Change Windows and/or Blackout Periods
Analyze the Impact of Modified Dates on Change Windows and Blackout Periods