Creating a Discovery Profile
The first time the ADE runs, you will need to create a discovery profile or import settings from another installation of the ADE. You can also create a new profile by clicking the New button ![]() on the Discovery Profile Settings screen.
on the Discovery Profile Settings screen.
Important: The correct credentials for domains or SNMP community strings are necessary for a successful scan. Correct credentials for domains include:
-
Domain administrators
-
Local administrators for machines within the domain
You will likely need to contact the network administrator for correct credentials.
To Create a New Discovery Profile:
-
Start the Discovery Wizard by opening the Asset Discovery Tool (Start > All Programs > Asset Discovery Expert > ADE Tool).
-
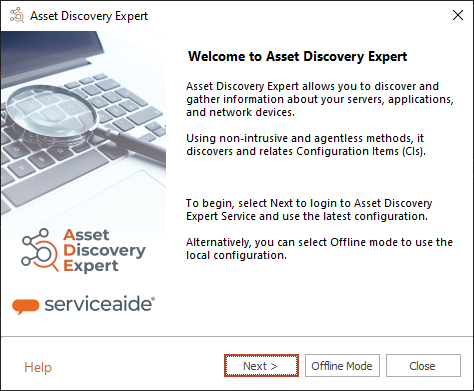
Choose Next in the Welcome screen.
-
On the Discovery Profile Settings dialog, choose New. The Discovery Settings dialog will display.
If this is your first time running the ADE, the Discovery Settings dialog will display as soon as you leave the Welcome screen. -
Select how you would like the Discovery Wizard to scan your resources. The ADE can only discover resources that are within the domain or IP ranges specified. If ADE does not discover certain resources, then they may not be within the specified IP range, cannot be pinged, are not in Active Directory (AD), or discovery is not enabled for that type of resource. When you are ready, click Next.
-
See Discovery Settings for more information about the different Discovery Techniques.
-
See Advanced Discovery Settings for more information about selecting certain resources to discover.
Tip: When you set up your Discovery Profiles, check the Advanced Discovery Settings to ensure the desired resource types are included in the scan. For example, Windows 11 devices are not discovered by default, so you'll need to manually enable this resource type.
-
-
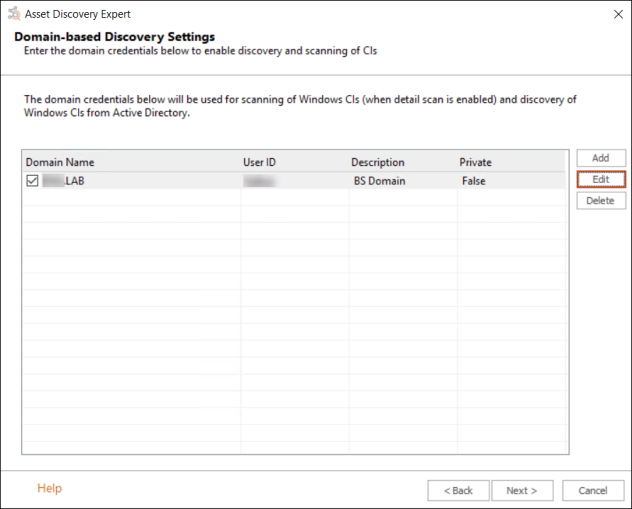
The Domain-Based Discovery Settings screen appears. You can Add, Edit, or Delete domains to scan as well as manage credentials for each domain. You can also enter the domains to scan, including credentials needed to perform the scans. The Show All button displays all credentials of the specific type (Domain, SNMP etc.) that currently exists in the credential cache. Users with console experience can also add or import credentials via the ADE command line utility. Note: This applies to all methods of discovery. For more information, see Import Credentials from External Tools for Discovery.
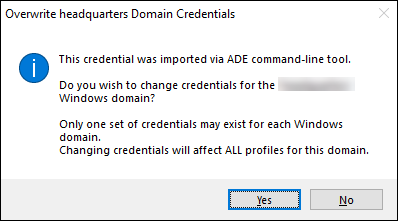
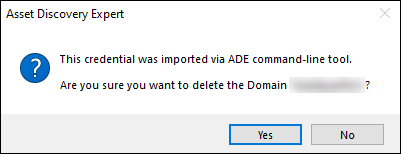
Important: If you try editing or deleting credentials imported from the credentials store, you'll receive a pop-up message alerting you that the credentials were imported via the ADE command line tool. This applies to all Discovery Techniques.
Pop-up if attempting to edit:
Pop-up if attempting to delete:
-
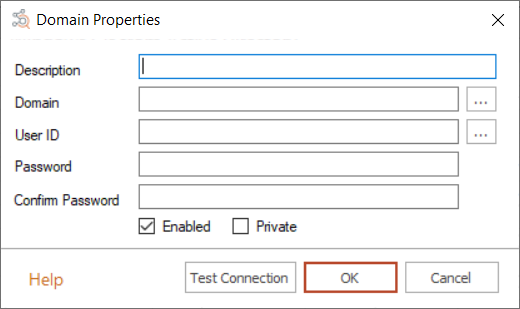
Choose the domain to scan. This will be used to discover Windows-based CIs from Active Directory (AD). You can validate the credentials you enter by clicking the Test Connection button on the Domain Properties dialog. Click OKto apply.
-
Click Next to continue.
-
-
If you selected IP Range Discovery, the IP Range Discovery Settings screen appears. Enter the IP range to scan or filter by. You can Add, Edit, and Delete IP ranges for the Discovery Wizard. Optionally, you can also choose IP ranges to exclude from the scan. Additionally, you can also enter any SSH, Telnet, or Windows credentials required to scan devices within the IP range. See IP Credentials for more information.
-
If you selected Detailed Resource Scan, you will be prompted to add SNMP credentials. Depending on the SNMP version selected in the Discovery Settings screen, you can either provide community strings (SNMP v1/v2) or authentication credentials (SNMP v3). You can Add, Edit, and Delete additional community strings or credentials.
-
For v1/v2, enter any community strings used by the devices on your network.
-
For v3, enter any credentials used by the devices on your network. You can provide a username, a password, and an encryption string. For the password and encryption phrase, specify the encryption methods used to encrypt the password and encryption phrase on your devices. You can also choose to use a set of credentials by checking the Enabled box. For a list of supported encryption types, see SNMPv3 Supported Encryption Types in the Appendix. Click Next to continue.
-
-
Click Save and Close to close the profile editor without performing any other actions, click Save and Discover to close the editor and begin discovering resources.
-
The ADE will discover the Configuration Items. A summary of the discovered resources will display. Choose Import. Depending on how large your network is, or how much of your network you have chosen to scan, this may take some time.
Note: Clicking Finish will close the dialog and return you to the profile management dialog without importing any resources.
-
Click Finish.
You have now imported the discovered CIs into Asset Discovery Expert. Newly discovered items are imported as "Unclassified" items. You can view the new items using the Views task menu under Favorites > Newly Discovered. See Viewing Newly Discovered CIs for more information.