Creating a Branched Workflow
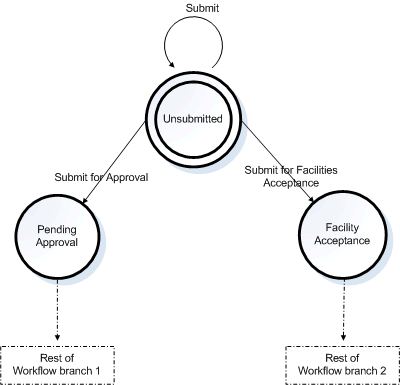
In this example, we are creating a branch during the Submit action wherein an RFC with a change type related to facilities will go to a different state than other tickets, and all other tickets will be sent to the Pending Approval state. This is accomplished by adding a condition to the Submit action that evaluates the Root Change Type of the submitted ticket and then determines, based on the condition, which workflow actions should be triggered based on the Change Type.
Note: This topic discusses branching within a single workflow. If you wish to branch to a different workflow, please see Configuring Multiple Workflows.
Note:
The user will see Submit on the action bar instead of an additional action for a Facilities request and a separate action for an IT Change Request. In this example, which branch is taken depends on the value of Change Type.
The Submit action has no Notification automation in this example. The notifications are sent when either the "Submit for Facilities Acceptance" or "Submit for Approval" action is run.
The privilege to trigger one branch or the other is controlled by the respective permissions for "Submit for Facilities Acceptance" and "Submit for Approval," while the Submit action still governs the overall ability to submit.
To create a branched workflow:
-
Navigate to ChangeGear Web > Administration > Design Studio, then select an app/module.
-
Select an existing workflow to modify. You can either create a copy of the workflow or double-click the row to open the workflow in Design Mode, then save it as a new workflow. If saving as a new workflow, name the workflow and click OK. For more information on creating workflows, see the topic, Workflow Designer. Be sure to enable the workflow after creating it.
-
Create a new state, e.g., "Facilities Accepted."
-
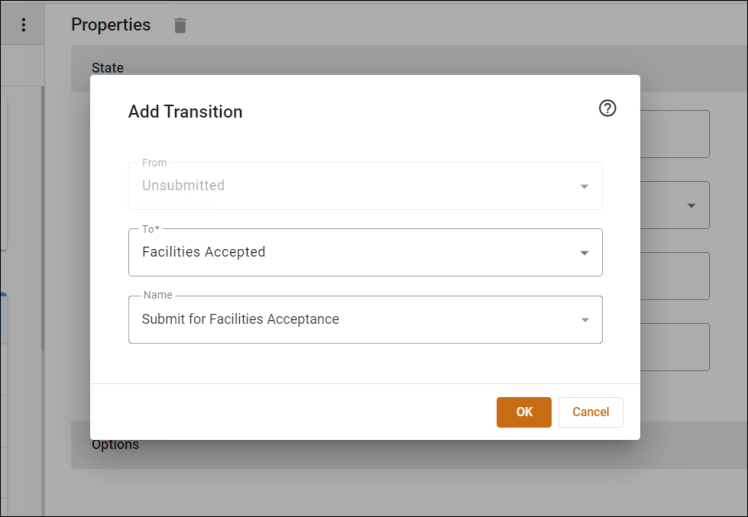
From the Unsubmitted state, create a new transition to the Facilities Accepted state. Type in Submit For Facilities Acceptance for the Name.
Note: More steps must be performed to create an "Approval" type state in the workflow. See Creating a New Approval State.
-
Click OK.
-
Add a transition from the Facilities Accepted state to the New state. Select Accept for the Name.
-
Click OK
-
Select the Unsubmitted state.
-
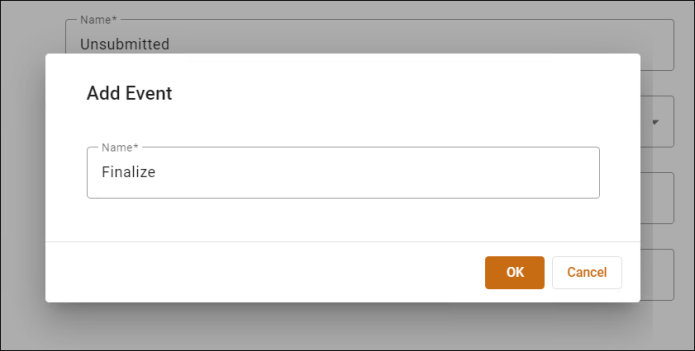
Create a new event.
-
Select Finalize for the Name.
-
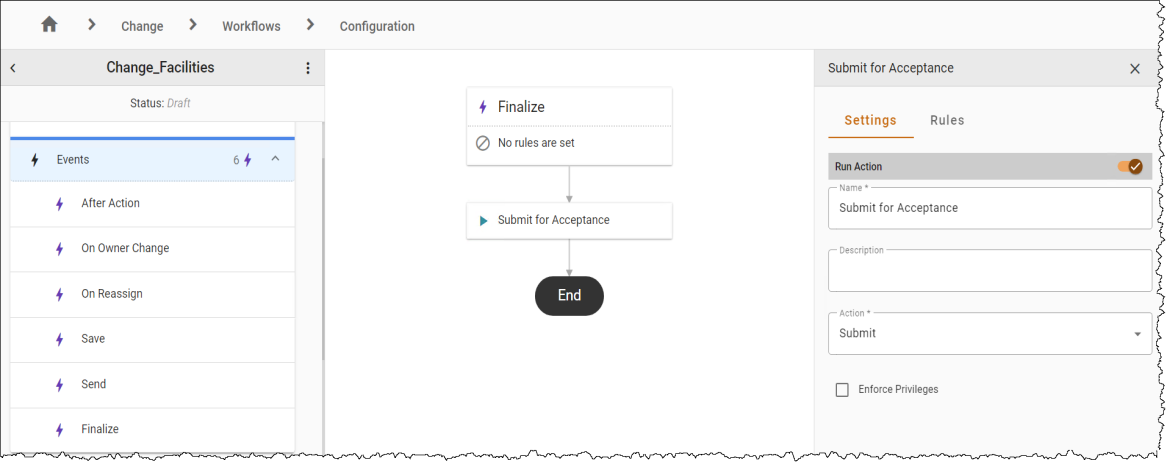
Create a new Run Action automation.
-
In Run Action Details, select Submit for Facilities Acceptance in the Name field.
-
Select Submit in the Action drop-down.
-
Select the toggle next to Run Action to enable the automation.
-
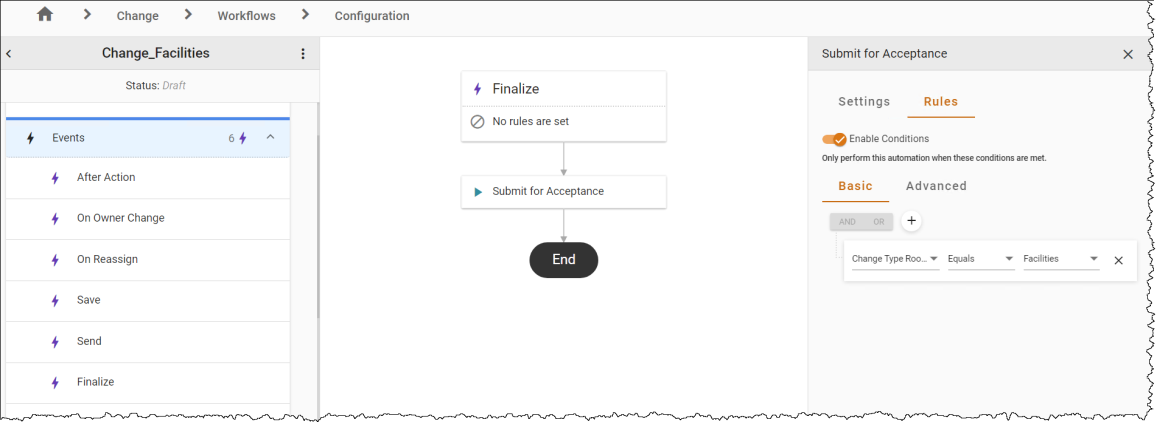
Navigate to the Rules tab.
-
Select the Enable Conditions option to "Always perform this automation when this action is performed."
-
Change the condition so that the action only applies when the ticket's Change Type Root Name equals Facilities.
-
Create another Run Action automation.
-
In Run Action Details, select Submit for Approval in the Name field.
-
Navigate to the Rules tab.
-
Select the Enable Conditions option to "Always perform this automation when this action is performed." This forces all tickets that do not have a facilities related change type to go through the approval process.
-
Click the three-dot menu next to the workflow name to Publish the changes.
To check that the workflow branch has been successfully implemented:
-
Go to ChangeGear Web and create a new RFC.
-
Select Facilities from the Change Type field.
-
Click Submit. The RFC enters the Facilities Acceptance state.
-
Create a new RFC.
-
Select Hardware from the Change Type field.
-
Click Submit. The RFC enters the Pending Approval state.